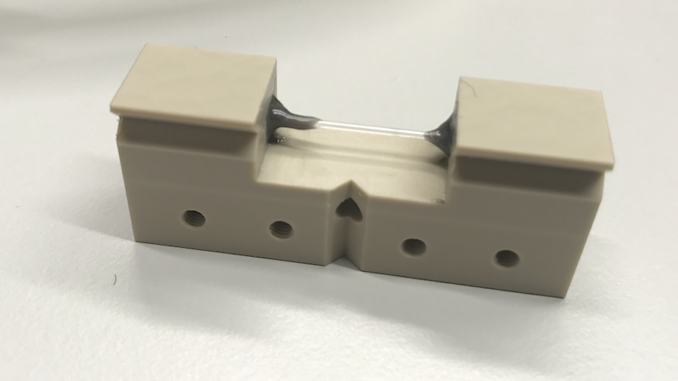
There have been discussions on Twitter, even amongst experienced X-ray scientists, on how to glue a capillary in place (see the discussions following this tweet). Practical skills like these are expected to be common knowledge, but more often than not, we’re learning about these through the scientific underground. Since Glen knew how to glue flow-through capillaries into our new PEEK holders, and do so in such a way to make them vacuum-tight, we decided to put this procedure in a five-minute video so it can be replicated in labs at home and abroad.
The video below shows a few things, first and foremost how to glue the borosilicate capillaries into place. Secondly, the connections are shown and lastly, we show how the capillary can be easily removed again from the PEEK holder, so that the holder can be reused. Unfortunately, the GoPro camera we used for this focuses nicely at infinity — and infinity only — so it is not as sharp as it could be up close. Nonetheless, we hope it brings the point across. If you like videos like this, we can share more tips and tricks.
Next up will be a post on the rack that we are having made, which will fit three of these capillary cells on top of one another, and how that will fit on our new standardized S-sized mount.

Nice video Brian. You can make the handling of epoxy neater too, by transferring thoroughly mixed epoxy into a 1 ml Luer syringe. Remove plunger and spoon epoxy into the syringe body. Replace plunger and you have nice control of epoxy flow. Add a suitably cut pipette tip to the Luer end for ultimate control…
Thanks, Andy, for making the nice explanation of that Epoxy syringe available here: https://twitter.com/evilokapi/status/1196461097198460928